In this post, I will explain how to use SMS OTP multi factor authenticator through WSO2 Identity server. We will be using Twilio SMS Provider which was used to send the OTP code via SMS at the time authentication happens. For this solution we will 2 WSO2 API Manager(2.1.0) and Identity server(5.3.0). Please note that we need to set port offset as 1 in carbon.xml configuration file available with identity server. So it will be running on https 9444 port.
First to to https://www.twilio.com and create account there. Then provide your mobile number and register that.
Then generate mobile number from twilio. Then it will give you new number for you to use.
curl -X POST 'https://api.twilio.com/2010-04-01/Accounts/({Account-Sid}/SMS/Messages.json' --data-urlencode 'To={Sender SMS}' --data-urlencode 'From={generated MobileNumber from Twilio}' --data-urlencode 'Body=enter this code' -H 'Authorization: Basic {base64Encoded(Account SId:Auth Token)}'
Please see the sample below.
curl -X POST 'https://api.twilio.com/2010-04-01/Accounts/fsdfdfdsfdfdsfdfsdfdsfdfdfdf/SMS/Messages.json' --data-urlencode 'To=+94745345779' --data-urlencode 'From=+1454543535' --data-urlencode 'Body=enter this code' -H 'Authorization: Basic LKJADJAD:ADJLJDJ:LAJDJDJJJJJJL::LMMIYGBNJN=='
Now it should send you message to your mobile number provided.
Now login to identity server and create new identity provider. When you do that provide following inputs in user interface.

Then go to federated authenticator section and add SMS OTP Configuration as follows. Provide basic authentication credentials like we did for CuRL request.
Please fill following fields as below.
SMS URL: https://api.twilio.com/2010-04-01/Accounts/ACd5ac7ff9sdsad3232432414b/SMS/Messages.json HTTP Method: POST HTTP Headers: Authorization: Basic QUNkNWFjN2ZmOTNTNmNjMzOWMwMjBkZQ==HTTP Payload: Body=$ctx.msg&To=$ctx.num&From=+125145435333434

Then let's add service provider as follows. Provide service provider name as follows.
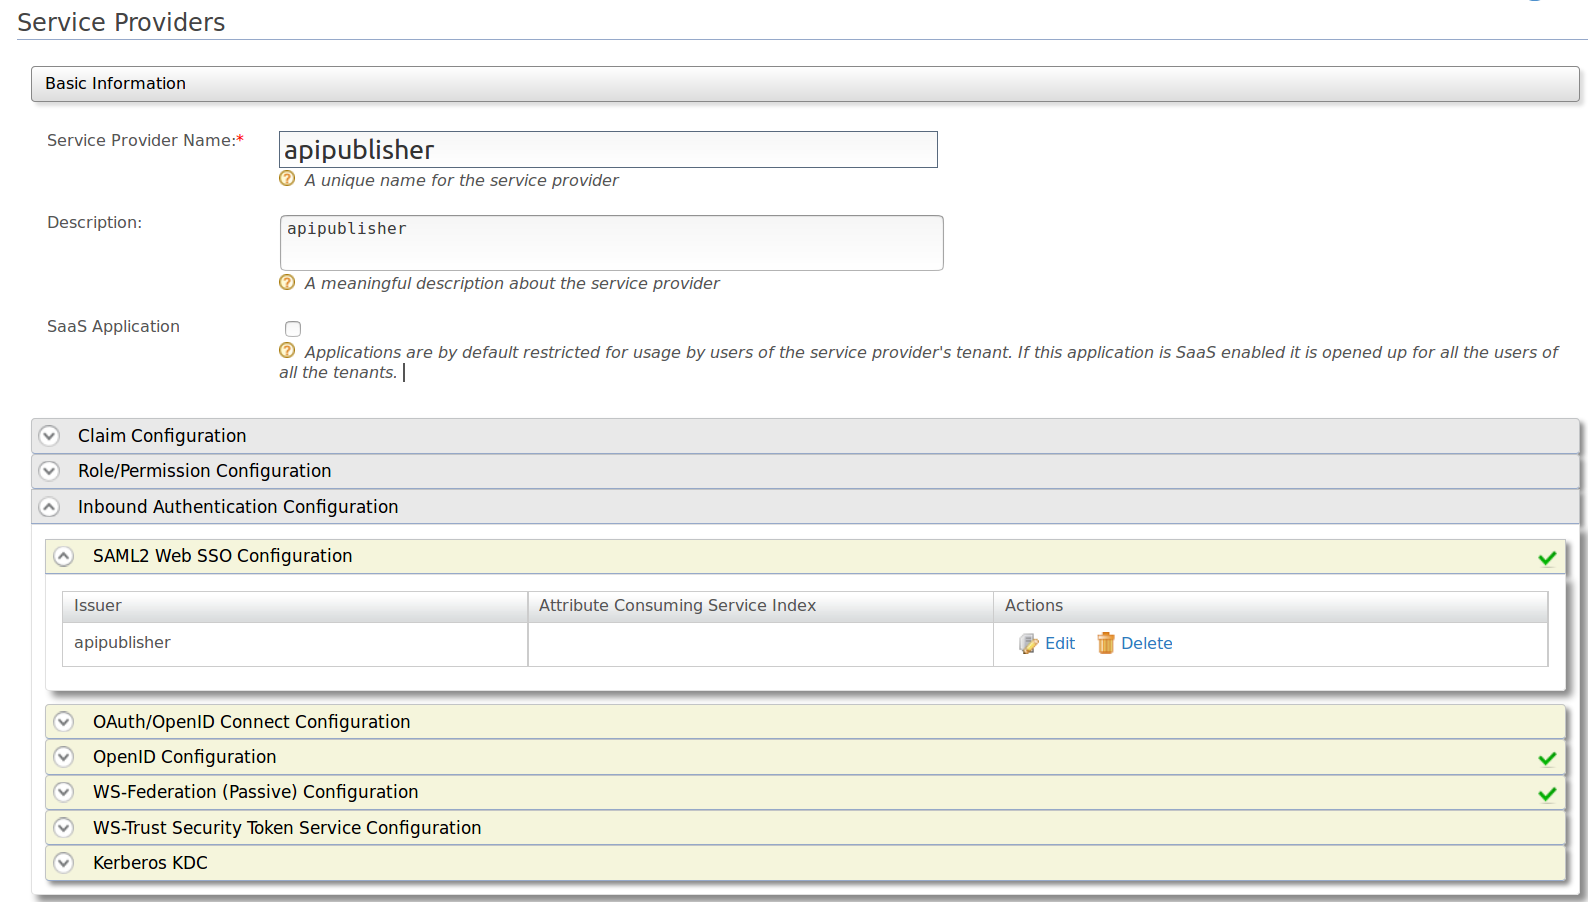
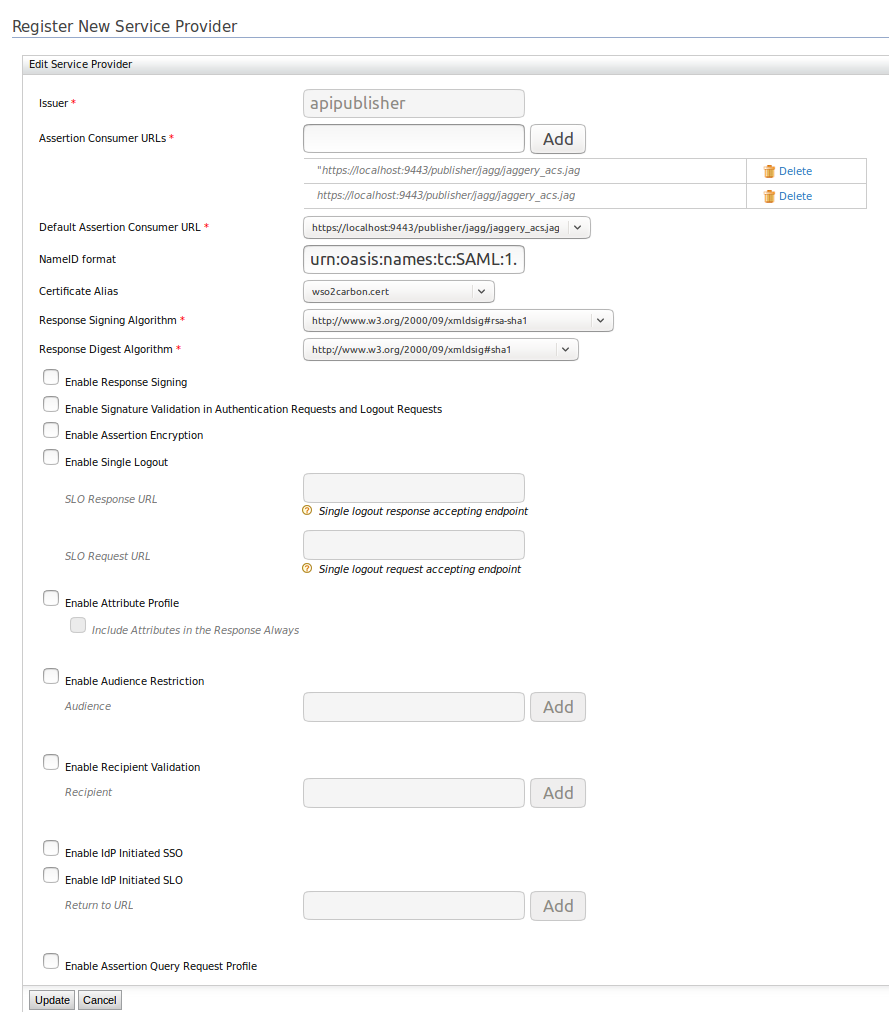
Then go to SAML2 web SSO configuration and provide following configurations. Then save it and move forward.
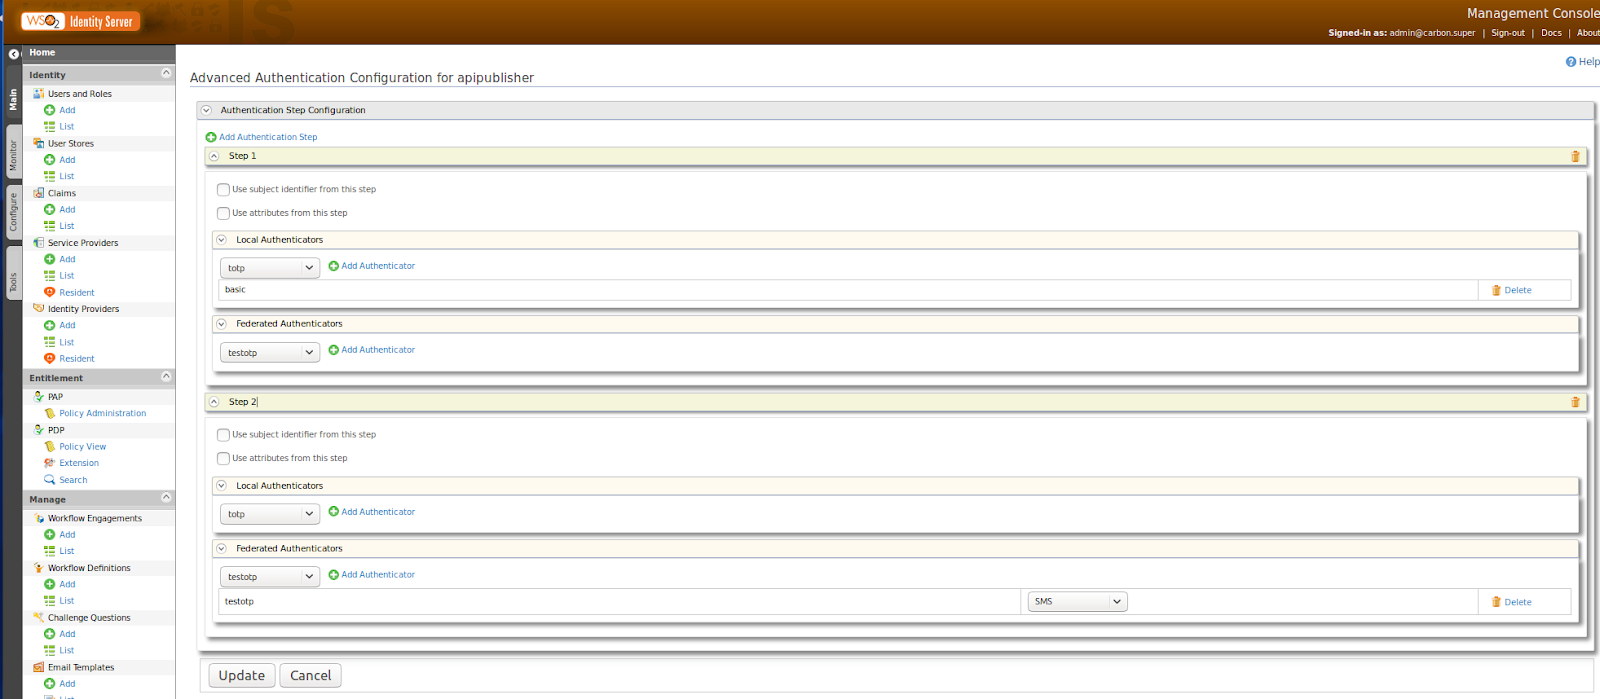
Now save this service provider and come back to identity server UI. Then we need to configure local and outbound authentication steps as follows. We need to configure advanced authentication configuration as we are going to configure multi step authentication.
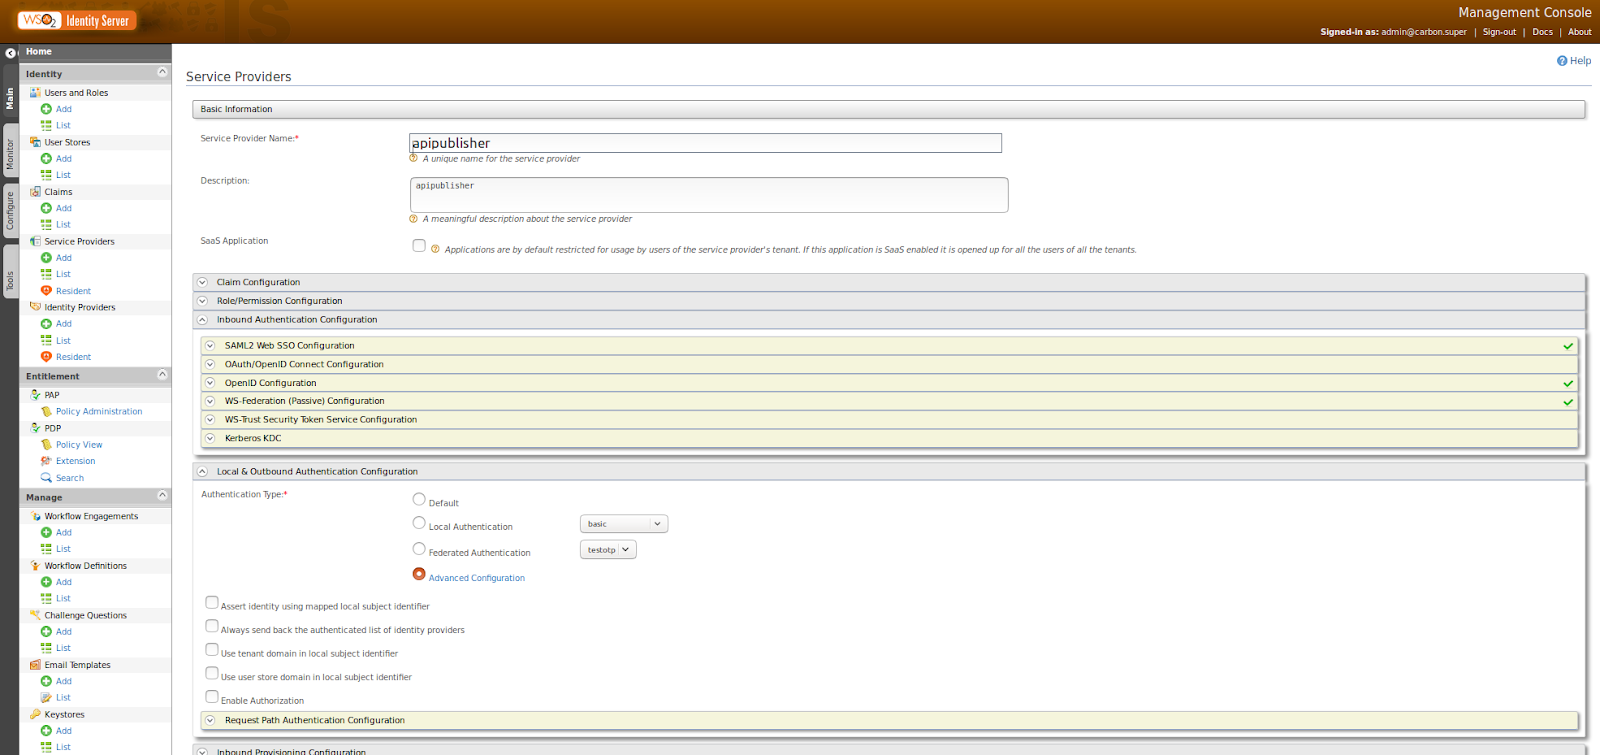
Then add username and password based local authentication as first steps and add out SMS otp as second authentication step. Now we can save this configuration and move forward.
Also add following configuration to wso2is-5.3.0/repository/conf/identity/application-authentication.xml file and restart server.
<AuthenticatorConfig name="SMSOTP" enabled="true">
<Parameter name="SMSOTPAuthenticationEndpointURL">https://localhost:9444/smsotpauthenticationendpoint/smsotp.jsp</Parameter>
<Parameter name="SMSOTPAuthenticationEndpointErrorPage">https://localhost:9444/smsotpauthenticationendpoint/smsotpError.jsp</Parameter>
<Parameter name="RetryEnable">true</Parameter>
<Parameter name="ResendEnable">true</Parameter>
<Parameter name="BackupCode">false</Parameter>
<Parameter name="EnableByUserClaim">false</Parameter>
<Parameter name="MobileClaim">true</Parameter>
<Parameter name="enableSecondStep">true</Parameter>
<Parameter name="SMSOTPMandatory">true</Parameter>
<Parameter name="usecase">association</Parameter>
<Parameter name="secondaryUserstore">primary</Parameter>
<Parameter name="screenUserAttribute">http://wso2.org/claims/mobile</Parameter>
<Parameter name="noOfDigits">4</Parameter>
<Parameter name="order">backward</Parameter>
</AuthenticatorConfig>
Now it's time to configure API publisher to configure, so it can work with identity server to do authentication based on SSO. Add following configuration to /wso2am-2.1.0/repository/deployment/server/jaggeryapps/publisher/site/conf/site.js file.
"ssoConfiguration" : {
"enabled" : "true",
"issuer" : "apipublisher",
"identityProviderURL" : "https://localhost:9444/samlsso",
"keyStorePassword" : "",
"identityAlias" : "",
"verifyAssertionValidityPeriod":"true",
"timestampSkewInSeconds":"300",
"audienceRestrictionsEnabled":"true",
"responseSigningEnabled":"false",
"assertionSigningEnabled":"true",
"keyStoreName" :"",
"signRequests" : "true",
"assertionEncryptionEnabled" : "false",
"idpInit" : "false",
}
Now go to API publisher URL and you will be directed to identity server login page. There you will see following window and you have to enter user name and password there.

Then once you completed it you will get SMS to number you have mentioned in your user profile. If you havent already added mobile number to your user profile please add by login to identity server. You can go to users and roles window and select user profile from there. Then edit it as follows.

Then enter the OTP you obtain in next window.

No comments:
Post a Comment